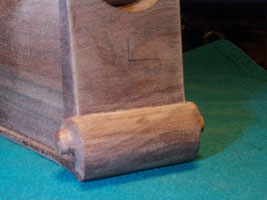
The pickup's output plug shell enters the dulcimer body through a hole in the center of the clear area of the end. The shell is .504" in diameter. Thirteen millimeters is .5118", which will give a very good film thickness for the epoxy we will use to secure the shell in the tailblock.
To drill this hole, use the following procedure:
- Mark center as illustrated above, between the width and height of the free area of the tailblock face. (I'm referring to the distance between the top of the scroll and the bottom of the semi-circular cutout at the top as the "free area".)
- Mark the center with an awl.
- Use a center drill or a small brad-pointed drill to start the hole.
- Select a small drill such as a 1/8" drill to begin the hole. The tailblock is a little less than 1-5/8" thick at this point, so wrap a piece of tape around the drill to let you see how progress is being had.
- Line up your drill bit along the axis of the dulcimer as closely as possible (Small angular mistakes here won't be critical.) and start the drill at low speed until you are sure of its bite and direction. Then drill through at your preferred speed, remembering to remove chips frequently, as this is a long blind hole.
- Move through a series of increments of, say about 1/16" or 2 mm, in drill size, so you aren't hogging the hole and don't get into non-cylindrical hole problems. Test the shell frequently for fit as you near the final diameter, to make sure your bit isn't cutting larger than its rated diameter.
- Vacuum out as much of the wood dust as possible from the interior.
- Clean the shell with alcohol or naptha to de-grease it.
- Mix up a two-part epoxy of your choice and sparingly smear it onto the inner surface of the hole. I usually use ordinary 5-minute epoxy. This stuff isn't ordinarily the best epoxy, but this joint is not a high-stress joint. Use higher grade stuff if you feel the need. Clean any excess off the face of the tailblock with alcohol.
- Gently slide the shell into the tail block un-threaded side first, until the outer edge of the shell stands just faintly out of the bottom edge of the hole -- just enough to make sure the plug will not be butting against wood when it's screwed in tight, later.
That's it for this step. Let the epoxy set then go on to preparing the saddle slot.
Click for larger view
Bear Meadow Fishman Pickup
Tailblock Prep
Tailblock Prep

