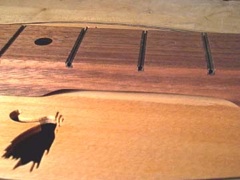
The FlexiFret channel goes into the slot cut in your fingerboard.
We will assemble the channel installation jig. This jig is used to ensure that the channels are installed level with the surface of the fingerboard, and flush with its edge.
 Here is a view of the Jig's parts. Going from left to right:
- The small cloth-covered elastic band ("band") is used to strap the jig parts securely together.
- The rectangular aluminum plate ("base plate") has grooves filed into its ends to form a good seet for the band. The base plate is clamped to the top surface of the channel (the surface with the groove milled in it), and will on the top of the fingerboard during final installation of the channel.
- The 1/16" square brass tube is the yoke ("yoke"). It has notches filed into its bottom edge, near each end.
- The 3/32" brass channel, cut to the length you specified, has a narrow groove milled in its top surface. The fret's tang is a slip fit into this groove.
 Here is how it goes together. First, you insert the yoke bar into the channel, orienting the notches in its end down and the slot in the channel up. (It is imperative that the slotted face of the channel be facing up -- that is, against the bottom of the base plate -- in the assembly!)

 Next, you place the base plate on top of the channel, that is on the slotted face of the channel. (Again, it is imperative that the slotted face of the channel be facing up in the assembly!) Fit the elastic band into one notch in the yoke bar, give it two or three twists to increase tension. Bring it over the base plate, fitting it into the grooves at the plate's corners, and over into the notch at the other end of the yoke bar.

 Now test fit the assembled jig and channel into a slot, to familiarize yourself with the setup. Note that there is room to place the face of a flat metal piece, such as a small 6" ruler, against one edge of the channel. Push the channel against the ruler to accurately register the end flush with the fingerboard.
Check to make sure the channel is an easy slip fit in its channel, with no binding at any point. This is a crucial point! Remove the jig assembly and set it aside.
Now mix a small amount of epoxy well, and use a small wooden toothpick to spread a tiny amount on the walls and floor of the slot. Clean up any stray epoxy off the fingerboard using a cloth or paper towel slightly dampened with alcohol. Don't use cotton swabs for this job, as they tend to leave lint fibers behind.
Now slip the assembled jig and channel into the slot and press firmly down, working the assembly to and fro slightly to ensure that any excess epoxy glue is expelled out the sides, and that the assembly is resting firmly on the fingerboard surface. This step is very important to get right. If you aren't sure, remove the jig assembly and inspect its bottom for squeezed-out epoxy -- a sure sign that the assembly was not sitting directly on the surface. Wipe any excess glue off. This time, it's all right to use a Q-Tip or cotton swab to remove the glue and replace the jig and channel into the slot.
Inspect the ends of the channel. Use your 6" ruler or other small flat metal piece to push against each side of the fingerboard to ensure that the channel is flush with ends. (The channel is supplied about .010" wider than you specify, ou can trim any small extra length flush after the glue sets, using your fine file.)
 If you can arrange it, clamp the jig/channel lightly against the fingerboard. As you clamp, remember that the channel may creep out of its slot slightly, so as you apply pressure, check that the channel ends remain flush with the edge of the fingerboard.
Finally, finish the channel clean to the fingerboard surface with a small fine file, followed by wet sanding with 400G and 600G, using mineral spirits (paint thinner) as a lubricant. Final finish with 0000 steel wool. Then trim the excess length with a small medium file, slightly beveling the corners to prevent sharp edges
This concludes the installation. I strongly recommend that, if you have more than one FlexiFret to install, you go through the complete process with one to ensure you fully understand the nuances of the procedure. Then you can do the remaining installations as a group.
 Next we insert the fretwire piece in the channel.
Installing the Channel