Assembling
the Dulcimer Body
The components of the body -- back, ribs, peghead and tailblock are assembled in one step in a building jig. Then further interior furnishings are added.
One point that should be made is that a sharp edge tends to deflect high energy sound and scatter it around the body. So I round every edge, allowing no sharp edges inside, though I've never worked out the math to find out whether edges of the length found inside the dulcimer would be reflectors for audible or near-audible wavelengths.
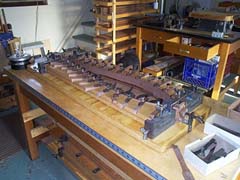
 We begin by assembling the major body parts in the building jig. Each model has its own jig. Assemblying into the jig is a dramatic moment, culminating lots of work in design, carving of peghead and tailblock, tonewood selection and preparation, and--in the case of the Concert Grand and Baby Grand--back ornamentation.
 The assembly is removed from the building mold, ready to receive inner structures. These bracings and linings give the body strength, so the dulcimer can be light and acoustically responsive without sacrificing strength.
 In creating the back, tailblock, and peghead, the edges and planes are made just approximately correct, to be trimmed later. Now we do that carving of the body to fair lines.
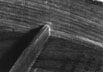
 Finally, we trim the top back to a fiddle edge. This is done free-hand with a very sharp knife, then the edge is faired with a sanding block, rounded slightly so the edge won't catch on things. The body is done. In such a simple step, our assembly is done.